

Spider Analysis Tool Manual
Welcome to the user manual of the Spider Spotter Analysis tool! In this tool you can analyse your spider pictures and calculate the colour of your spider and measure its length!
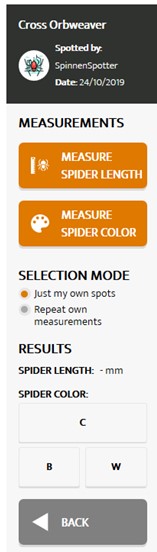
On the starting screen you can see your picture in the centre and a column to the left and right. Underneath the page, you can see that “BACK” and “SKIP” buttons that allow you to navigate through the pictures.
 In the left column you can find:
Picture details.
Two measurement buttons for spider colour and length.
Selection mode where you can select to analyse all spider pictures or “just my own spots”. You can also select to “repeat your own measurements”.
Results section. Here, the results of your measurements will appear!
 Spider Length:
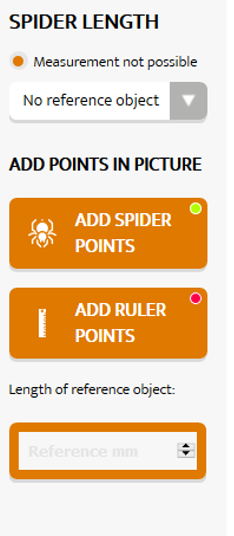
Clicking the “measure spider length” button reveals the right column where you can indicate if the measurement is not possible due to a missing reference object, the picture being too blurry or too dark, the spider being too small or if there is no spider in the picture.
You can only measure spider length if there is a reference object in the picture that can be used as a standard. This can be a ruler or any other object of which the dimensions are known.
There are three steps to measure the length of a spider:
- Click the “Add spider points” button and place one point on the far end of the abdomen and one on the top of the head of the spider. You can zoom in on the picture to place your points and points can be dragged and repositioned anywhere you like!
- Click the “Add ruler points” button and place the points on the reference object. For example, you can mark one centimetre on the ruler.
- Fill in the length of the reference object in mm in the box. If you have marked one centimetre on the ruler you fill in “10”.
The length of your spider is now automatically calculated and appears in the results box!
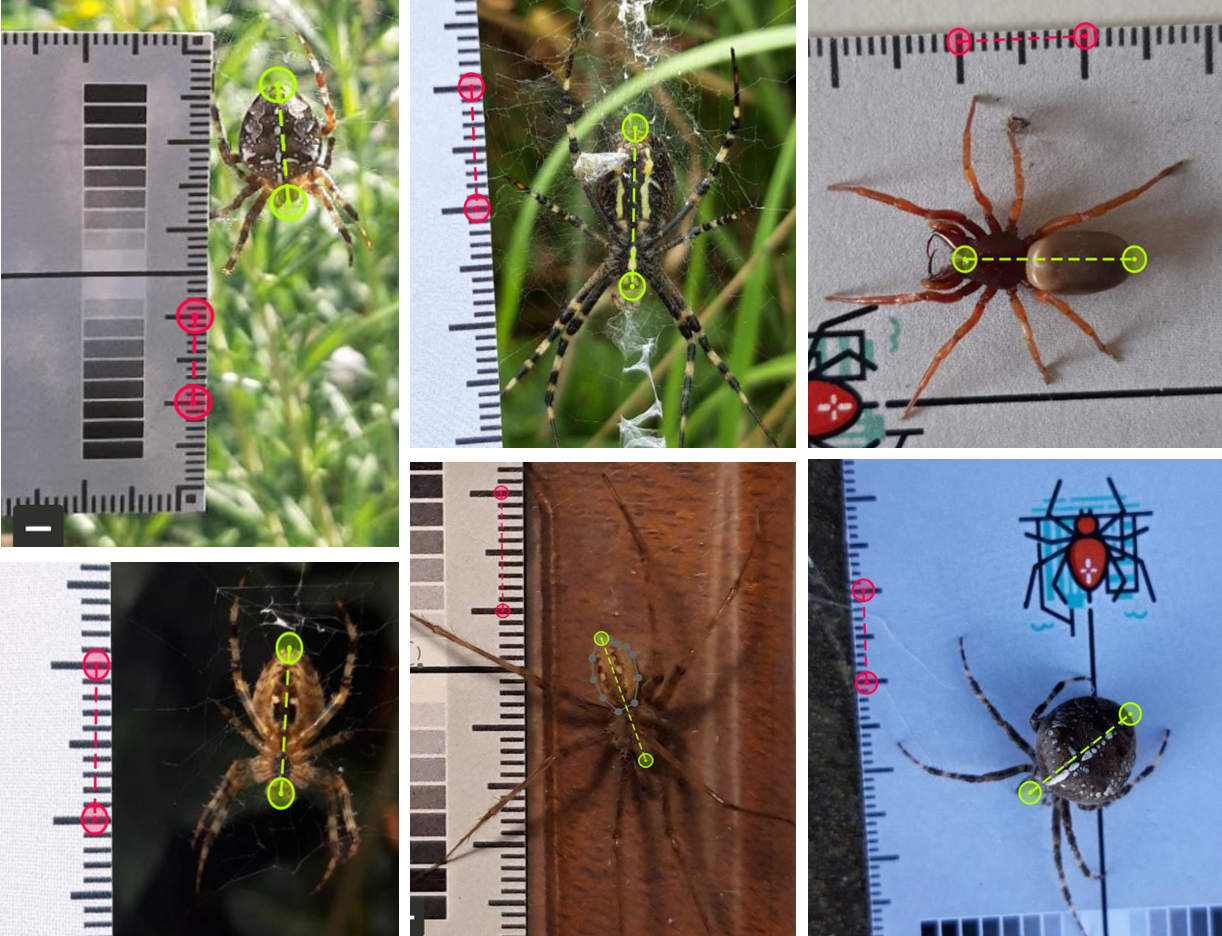
Have a look at these examples how to put the points on the spider and ruler!
 Spider Colour:
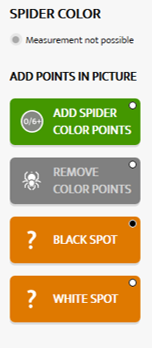
Clicking the “Measure Spider Colour” button also reveals the colour analysis menu on the right side where you can indicate whether the measurement is not possible due to the picture being too blurry or too dark, the spider being too small or if there is no spider in the picture. In contrast with measuring spider length, you can also calculate spider colour if the calibration card is absent!
There are three steps to calculate spider colour:
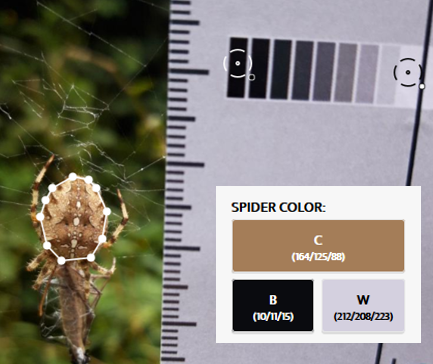
- Click the “Add spider color points” button and select the abdomen of the spider. Points can be dragged and repositioned anywhere you like! You can zoom in to get a better view!
- Click the “Black spot” button and select one of the black squares on the Calibration Card.
- Click the “White spot” button and select one of the white squares on the Calibration Card.
The colour of the abdomen of your spider is now automatically calculated and appears in the results section. The box with the large C is filled with the colour of your spider (averaged for the entire abdomen) and the RGB values are given in between brackets. This Red/Green/Blue value determines every colour by indicating the intensity of Red, Green and Blue. Black has a value of 0/0/0 and white of 255/255/255. You can play around with RGB values on this website : https://www.rapidtables.com/web/color/RGB_Color.html
You will see that the spider colour can be influenced by how bright a picture is (light intensity). If you take a picture of the same spider in the sun or in cloudy conditions, the colour is be different depending on light intensity. That is why you select the Black and White square on the Calibration Card as it allows us to afterwards correct for the light intensity in your picture!
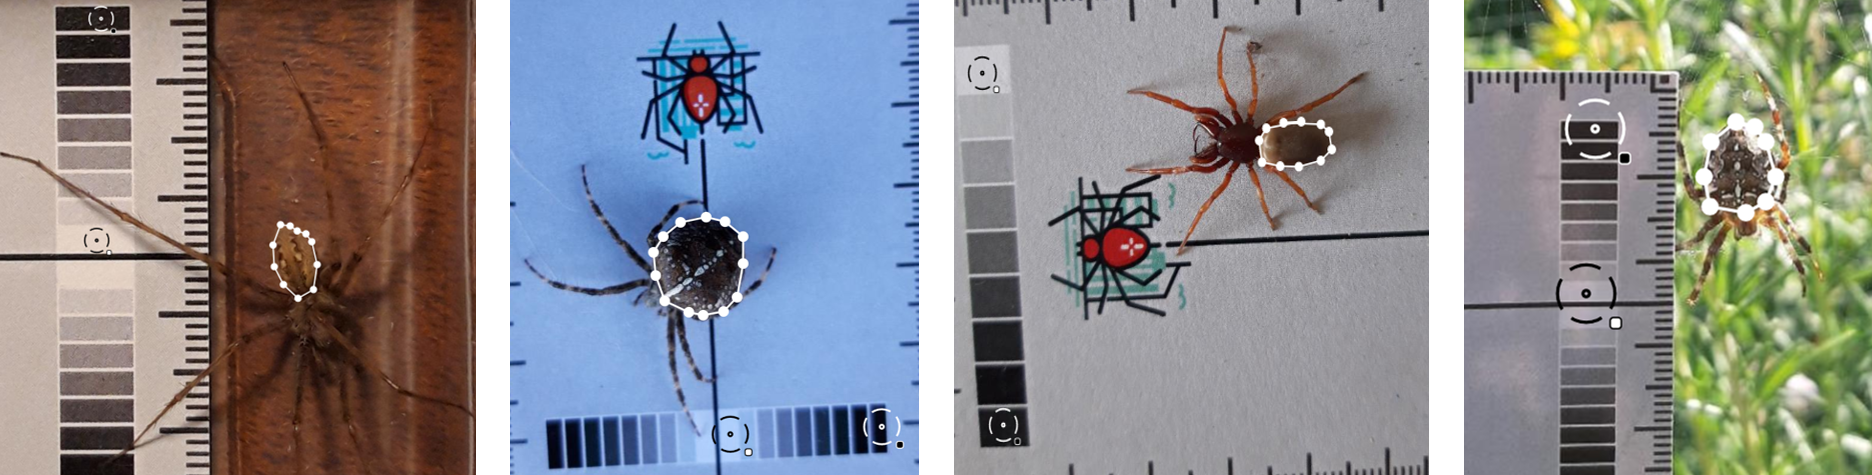
Here are some more pictures that illustrate how to put the spider colour points on the abdomen:
If you are happy with your measurements, you can click the “Send” button. This will register your spider picture results in our database!